
Building a Torsion Box Assembly table from Hollow Core Doors!
Watch me build the Assembly Table
Watch me build an organizer to go in the Assembly Table

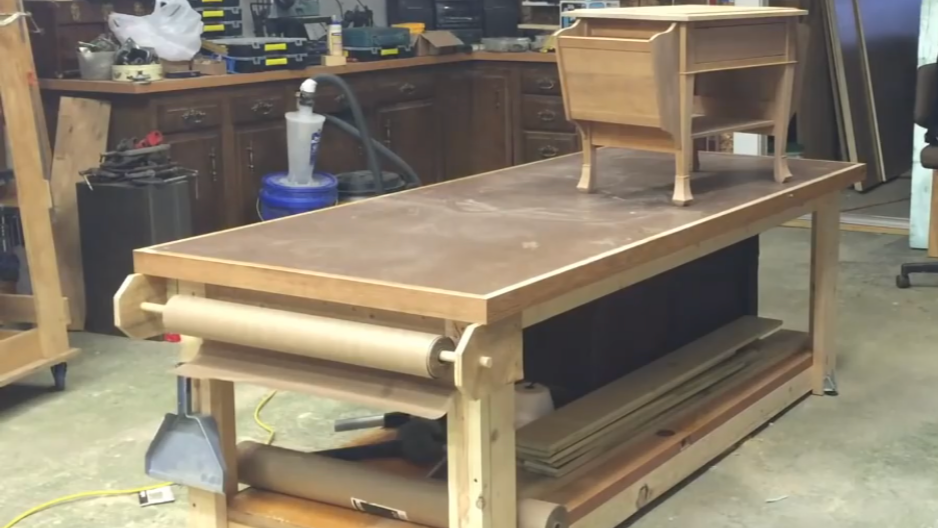
When building furniture, one of the most important things is to make sure you keep everything square. This is almost impossible unless you are building off of a surface that is perfectly in plane. That is why it is very important to have a table built specifically for assembly.

A torsion box is a common way to build a surface that is not only flat from the beginning but that also resist twisting with changes in temperature and humidity. It is made from two skins with a grid of small squares, hexagons or octagons in between them. This grid is what helps to resist movement.
A torsion box takes a long time to make and the cost of material can add up, but there is a cheaper way. An everyday product that is built with a torsion box is a cheap flush hollow core door. These can be purchased at your local home center for around $30 for a 36” x 80” door. Doors are made with a torsion box because they too need to be able to resit warping. Luckily for me I had just remodeled my house and I saved all of the door slabs that I removed from the house. I used two of them in this project. One for the Top and one for a lower shelf. There is one major drawback to hollow core doors however and that is how thin the door skin is. This is fine for a door in most cases, however for a table that is going to have heavy objects on it and a lot of pounding with hammers and other tools it is not so good, so if you are going to use a door as your torsion box you need to be sure to add a suitable surface on the top side to take the abuse. I used 1/2” mdf with a layer of 1/4” hardboard to be a replaceable surface for mine
A Cabinet for My Parts Storage

If you watched my first build video then you know from the beginning I wanted to build storage for my parts containers since I first built the Assembly Table. But like most things, other projects seemed more important at the time and it took nearly 3 years for me to get around to doing so. I store all of my parts in Stanley SortMaster Junior organizers. I like them because they have 4 latches on them and I have yet to have one open on me while carrying them. I also like that you can connect up to three of them together so if I need to carry a few of them to somewhere else in the shop or on the property I can easily carry six at a time.


I made two separate cabinets that slide in from either side to hold the organizers. I started off by measuring the space I had between the corner post of the table and backed out my spacing from there. One of them I built with 4 columns and 5 rows each slot sized for the Stanley Sortmaster Junior Organizer. On the other side I took a different approach. I had recently purchased a few Harbor Freight organizers. They are smaller than the Stanley, but because the bins are completely removable they have proved nice for storing small tools with accessories like a dremel and also other things that have a combination of large and small parts. I decided that I wanted to build some slots for these organizers on the other side. I also wanted to add a place to store my glue. 95% of the time when I am using glue in my shop it is at my assembly table so I thought it made sense to make a small storage are just for the glue.
At this point, the project could have been finished, however, this project marked a notable change in the Shawnee Hills Workshop. In the past I never put finish on any of my shop projects, honestly it just seemed pointless to me. As I have gotten older though, I have started seeing value in how things look. When you are in a space that you feel relaxed and comfortable in you tend to spend more time in that space and that is what is happening in my workshop as I have been making it look nicer. This table was the first piece I painted when I finished it and it has sparked a complete shop remodel!
